Green energy is reshaping the future of the planet—and your wallet. Discover eco-friendly solutions, clean power trends, solar panels, off-grid living tips, and breakthrough technologies for sustainable homes and energy independence. From DIY solar setups to green investing and renewable resources, this blog empowers you to save money and the environment with the best green energy tips and tools available today.
The best architecture blurs the lines between the outdoors and the inside space, marrying together elements of nature at every interior turn. Developers from 10 Design kept this concept in the forefront while completing Jinwan Mall, a new lakefront shopping mall in Zhuhai. The 117,000 square meters Jinwan Mall covers all the bases for a modern shopping center with striking visual appeal and function. It’s nestled up to the edge of Jinsha Lake in Zhuhai, China , which gives visitors a chance to connect with the environment . Related: Canada library reflects elements of parks and shopping malls Jinwan Mall is 10 Design’s second completed project on Huafa’s Jinwan Aviation City, along with the recently built Industrial Service Center and soon to be completed International Business Center. The massive mall undertaking was completed through a partnership of Ted Givens and Scott Findley. They designed it together with Project Partner Miriam Auyeung (COO), Project Leader Sonja Stoffels, and the entire architectural team made up of Peby Pratama, Joyce Lo, Vincent Fung, Yan Liu, Lufei Li, Wang Yang, Ruizhao Zhang and Echo Zhong. The basis of the design comes from nature and is mirrored in the integration of a traditional courtyard garden into the contemporary space. In addition to the views of plants and lake, the campus incorporates the main mall, retail street and the waterside pavilions consisting of F&B and retail spaces with ample outdoor spaces. A glass canopy spine connects the retail street and the mall, which provides protection from the weather while moving between the spaces. The striking façade represents the classic architecture of Chinese stacked stone walls and highlights unique and modern-day features such as the rhombi shapes inspired by the 4th-dimensional hypercube. In combination, the design creates a balance between dark and light, as well as massed areas with perforated panels and glass to provide natural light . “Our design for Jinwan Mall transforms the regular shopping mall into an outdoor retail experience closely linked to nature, creating a new paradigm of how people experience retail spaces and bringing a new destination to Zhuhai’s Jinwan District,” said Design Partner Ted Givens. Jinwan Mall designers braced against road noise with a solid wall to buffer sound on the street side. By contrast, the waterfront side of the mall features endless rows of windows and accesses to the pedestrian-rich area that features areas for pop-up shops and performances. The views towards the mall present green terraces and lakefront gardens that transition visitors into the space. “The Jinwan Mall development has been designed to maximize the nature and outdoor lifestyle of Zhuhai whilst tying it to the hypermodern concepts of discovery and exploration,” said Project Partner Miriam Auyeung (COO). “This new retail destination will provide the city with a public landmark that is inviting and accessible for all.” + 10 Design Images via 10 Design
A stovetop potpourri is basically a simmering pot made of spices, dried fruit peels, and/or extracts. Enjoy my favorites but be creative too!
Stovetop Potpourri
My thermostat is having trouble keeping the house warm lately. In other words, the cold weather is here to stay. So on very cold days, it seems like the furnace just runs and runs.
That’s when I often decide to get out the simmering pot to warm things up. In short, the idea is quite simple. It is a basic stovetop potpourri made up of spices, dried fruit peels, and/or extracts. There are really an infinite amount of combinations and it is so fun to experiment. So below I’ll share with you several of my favorite recipes.
Benefits of Stovetop Potpourri
There are so many benefits to using simmering pots, but my favorite is as a replacement for air fresheners. This simple DIY project will fill your entire home with the most wonderful aroma so easily. It seems to last and last throughout the day, even after you have stopped using the simmering pot.
Additionally, stovetop potpourri is a wonderful way to add moisture to the air. I often leave mine on for an hour or two, replacing the water as needed. All of that extra moisture in the air helps the heat to stay longer and carries the aroma throughout my house. The only downside to a simmering pot is having to clean the pot afterward! That’s why I have a “dedicated” pot for this very reason. It’s very well-loved but not very pretty to look at.
Note
Be sure to keep your simmer pot on the back burner and replenish with water frequently. I can’t tell you how many times I’ve forgotten about mine only to go into the kitchen and realize that I needed to add water ASAP!
Below you will find a list of suggested spices, herbs, fruit peels, and extracts that can be used in simmering pots. However, this list is not exhaustive by any means. To clarify, it’s just a few suggestions to help get your creative juices flowing. Finally, I will share with you several of my favorite simmering pot recipes after these suggestions.
Water glassing eggs is a simple process of preserving eggs in lime water. Store in the pantry for up to 2 years and use as if they were fresh.
I have a small farm that includes about 30 chickens. In the summer, I get a ton of eggs. Sometimes literally! Upwards of 175 a week! I sell some and use some, but some end up going to waste because there’s no way to use them all. I remember my uncles storing their eggs in an old glass gallon jar. So I looked into it and it’s easier than you may think!
Water Glassing Eggs
You’ll want to start with clean eggs. Don’t use any that have poop or mud on them. But also, don’t wash them. When you wash eggs, it takes the “bloom” off of them and air can get inside. They will go bad faster. In the water tank, they can get water in them, which will result in rotten eggs in a very short time. So choose clean eggs that have not been washed for this project. Egg size or color doesn’t matter, so you can mix sizes and colors, or even create a cool pattern. You’ll be able to display your eggs on the counter as they are working. Or store them in a pantry.
What you’ll need
Water glassing eggs is a very simple project. You’ll need very few items and may even have them in your home already.
plastic wrap or a plastic bag large enough to fit across the top of the jar with overlap
I use a big bowl to mix the lime and water before I put the eggs into it. Use 1 quart of water to 1 ounce of pickling lime. Be sure you weigh the water and lime for the best results. Depending on the size of your container, that could be 4 quarts of water to 4 ounces of lime or 8 quarts of water to 8 ounces of lime. I start with a smaller amount until I can see how the eggs will fill up the jar. I can always make more if I need it.
Make sure the jar is clean and sterilized. I run mine through the dishwasher.
Make sure your pickling lime is mostly dissolved before you add it to the eggs. There may be small bits that may remain after mixing. These are just larger crystals and will dissolve over time.
The Process of Water Glassing Eggs
Now that you have all of your materials ready, you can start assembling your jar. Add a layer of eggs to the bottom of the jar. You can either keep adding eggs randomly or make a cute pattern out of them. I put any that are weird shaped in the middle. As long as the shell is good, they’ll be fine. Try to place them with the pointy end down. This is how you would store them in the refrigerator to keep them fresh longer. Think of this as long-term storage as well.
Add Lime Water
Once you have all your eggs in place, pour the lime water over the top. Make sure all of the eggs are covered, every single bit. If any part of the egg is exposed to the air, rot can occur over time. If you have space left in your jar, that’s ok. You can just add more eggs later.
What happens over time is that the pickling lime will start to fill in around the shell of the egg. This can help to keep them fresh for up to 2 years! I’ve seen studies done and the success rate at 8 months is around 100%. That means that all of the eggs were still good at that point.
Seal and Store
When you get all of your water glassing eggs and liquid in place, top the jar with plastic wrap. I know plastic wrap is bad in most cases, but in this case, it’s helping to form a seal. You can also use a plastic bag that fits in the top of the jar. When you get that on, cap the jar and tighten the lid.
As an alternative, you can float a good-sized layer of oil on the top. A quarter of an inch is good. Just enough to keep air out of it. This will hold up for a while but could go rancid over time, which is why I recommend the plastic wrap first. If you use the oil method, keep checking it over time.
That’s about it! Just be sure to rinse off your eggs before you use them. If a slight layer of crystals forms on top of the water, that’s normal. It’s just the lime recrystallizing. Your eggs will, believe it or not, look and taste just like they do when they are fresh. I’ve never really noticed any difference.
Have you tried water glassing eggs? It’s time to start a batch!
Learn how to make wool dryer balls, then save time, money, and energy by tossing them in with each dryer load. They also reduce static cling!
How to Make Wool Dryer Balls
So about three years ago Matt purchased a set of felted wool dryer balls on Etsy. When he opened the package I laughed and asked why he was purchasing balls of yarn for such a ridiculous price! Then he explained the purpose of the dryer balls and asked if I would experiment with them in our laundry.
While wool dryer balls are not a new concept, I had never heard of them. Nevertheless, people have been making them for years as an eco-friendly alternative to dryer sheets and liquid fabric softeners. (Read about our homemade dryer sheets and fabric softener.) But wool dryer balls can do so much more than just eliminate chemicals from your laundry.
Benefits of Using Wool Dryer Balls
You should learn how to make wool dryer balls for all of the following reasons:
To begin with, wool dryer balls decrease drying time, saving you money on utility bills. Which is especially helpful in the winter months!
Commercial fabric softeners and dryer sheets are filled with harmful chemicals and perfumes that coat your clothing, eventually ending up on your skin. These chemicals can be especially harsh on sensitive skin. In contrast, there are no chemicals in wool dryer balls!
Commercial dryer sheets are costly and you must throw them away after one use. Conversely, wool dryer balls can be re-used for years, saving you hundreds of dollars.
Commercial fabric softeners shouldn’t be used on cloth diapers. Wool dryer balls are perfect for keeping your cloth diapers soft and chemical-free.
Wool dryer balls won’t affect the absorbency of your towels, kitchen cloths, or cloth diapers – commercial softeners will.
100% wool dryer balls increase fluffiness and reduce static as dryer loads tumble.
Dryer balls help to soften clothes naturally.
Dryer balls are made from a renewable resource.
According to Energy.gov:
Wool or rubber dryer balls will help separate your clothes and get more air to them, cutting drying time. They can also reduce static so you don’t need dryer sheets (see #7 below). The wool balls are said to absorb some moisture, further cutting drying time. We use these at my house and have seen a noticeable difference in the time it takes our clothes to dry.[1]
How do Wool Dryer Balls work?
It’s simple. They bounce around in the dryer separating clothes, allowing more hot air to circulate through all the garments. As they tumble, the wool balls fluff your laundry, reduce wrinkles, and pummel the laundry to make it softer. They do so much more than a dryer sheet by pulling moisture out of your clothes so you don’t have to run the dryer as long. The more dryer balls you have in a load, the shorter the drying time will be.
Maybe you’re using those plastic PVC dryer balls because you don’t want the chemical scents from commercial products coating your laundry. We don’t recommend these, because plastic releases all kinds of nasty chemicals when it’s heated. Ditto for tennis balls. Wool dryer balls are a much more natural, chemical-free alternative to all the other options out there.
Don’t bother paying someone else to wind yarn into a ball for you; learning how to make wool dryer balls is simple. You can do it while watching a movie, helping kids with homework, or waiting for dinner to cook.
How to Make Wool Dryer Balls (Felted Yarn)
Choosing Your Yarn
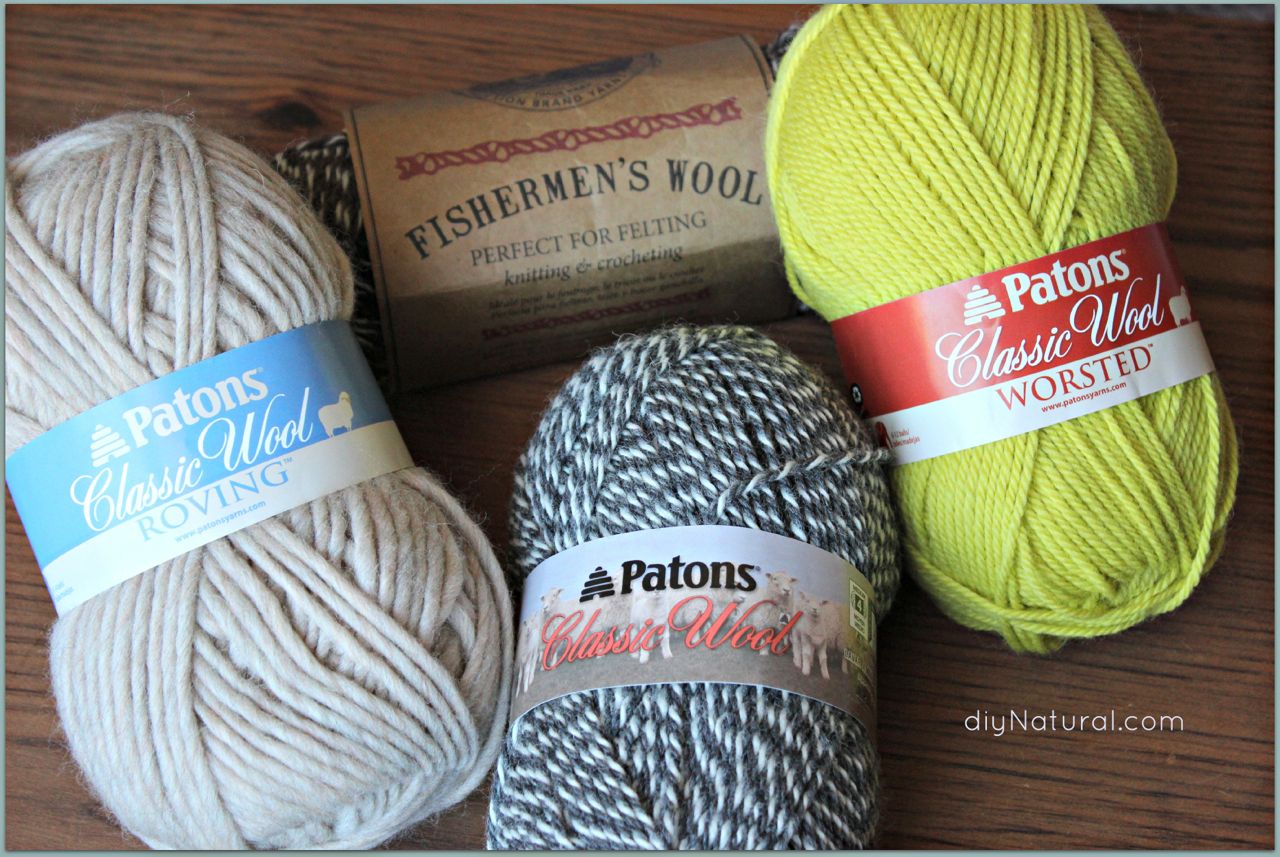
Finding the right yarn is the most critical part of making these wool balls. Look for 100% wool yarn. Most hobby stores sell it, or you can purchase it online here.
Note: Stay away from any wool labeled “superwash” or “machine washable.” This type will NOT felt.
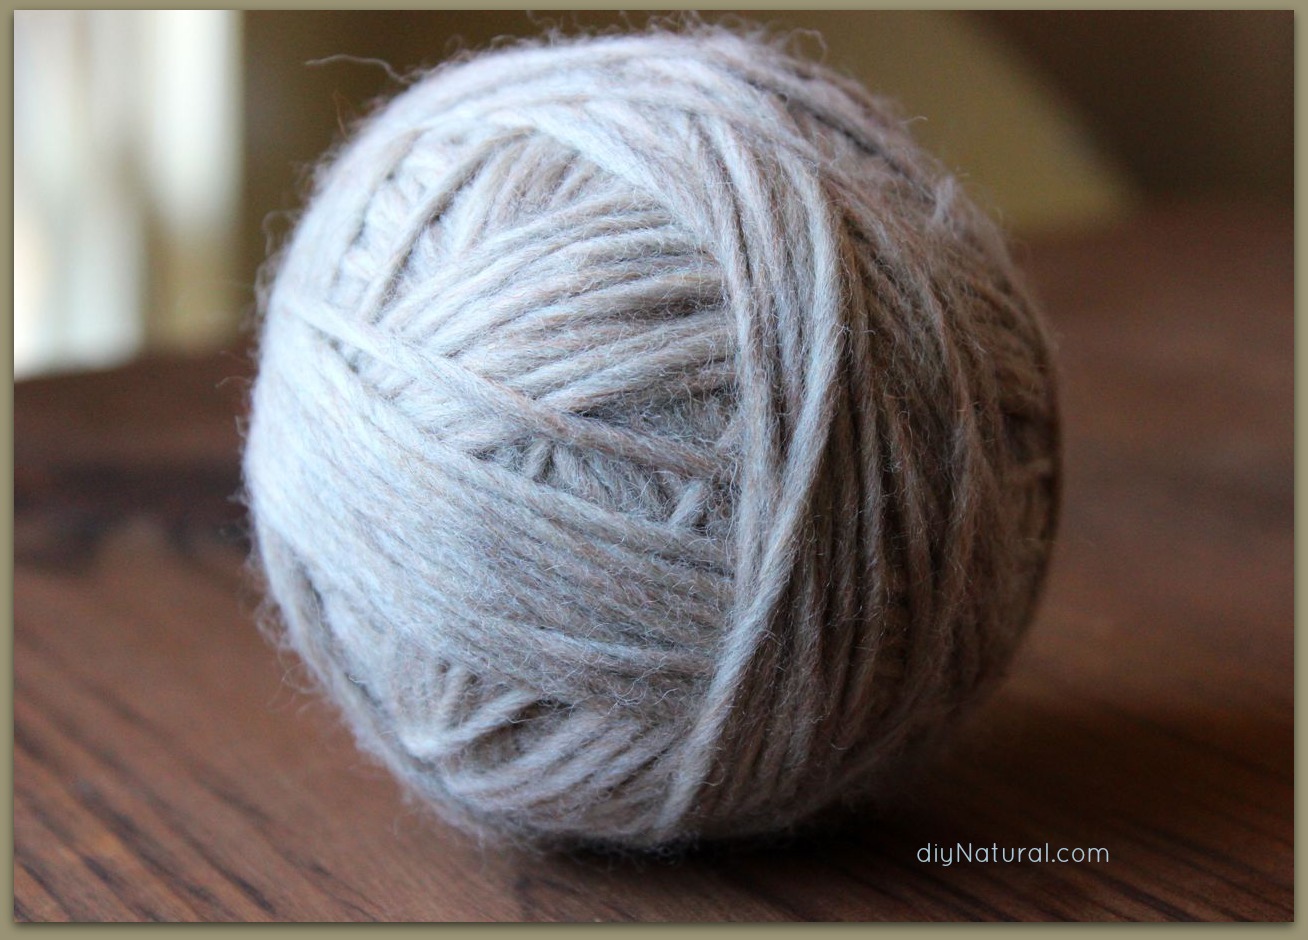
I have successfully used many types of wool yarn to make felted wool dryer balls, but I prefer the thick, lightly spun roving yarn (pictured in beige below). It felts much better than the Fishermen’s Wool or the other tightly spun wool yarns.
Be thrifty and “green” by unraveling an old 100% wool sweater you’re not wearing, or purchase wool sweaters at a second-hand store and use the yarn for this project (or other projects). If you use a yarn with even the slightest bit of acrylic or other blends, your balls won’t felt correct, if at all. If they are not felted, they will unravel in the dryer and you’ll have a stringy mess.
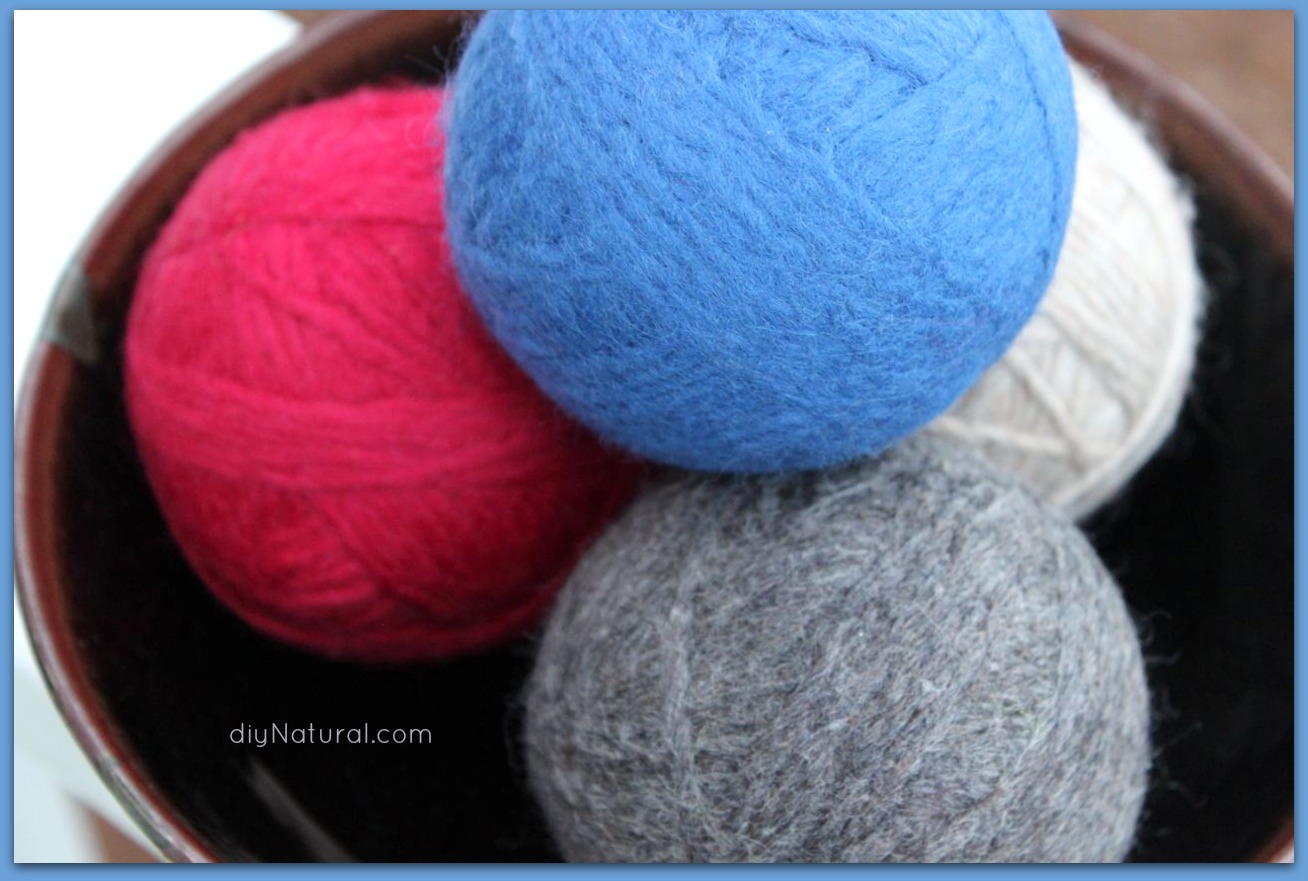
I like to use brightly colored yarn so I can easily separate the dryer balls from my clothes when coming out of the dryer. I haven’t had trouble with colors from the yarn balls bleeding onto fabrics, but you can choose lighter colors of yarn if you’re worried about this.
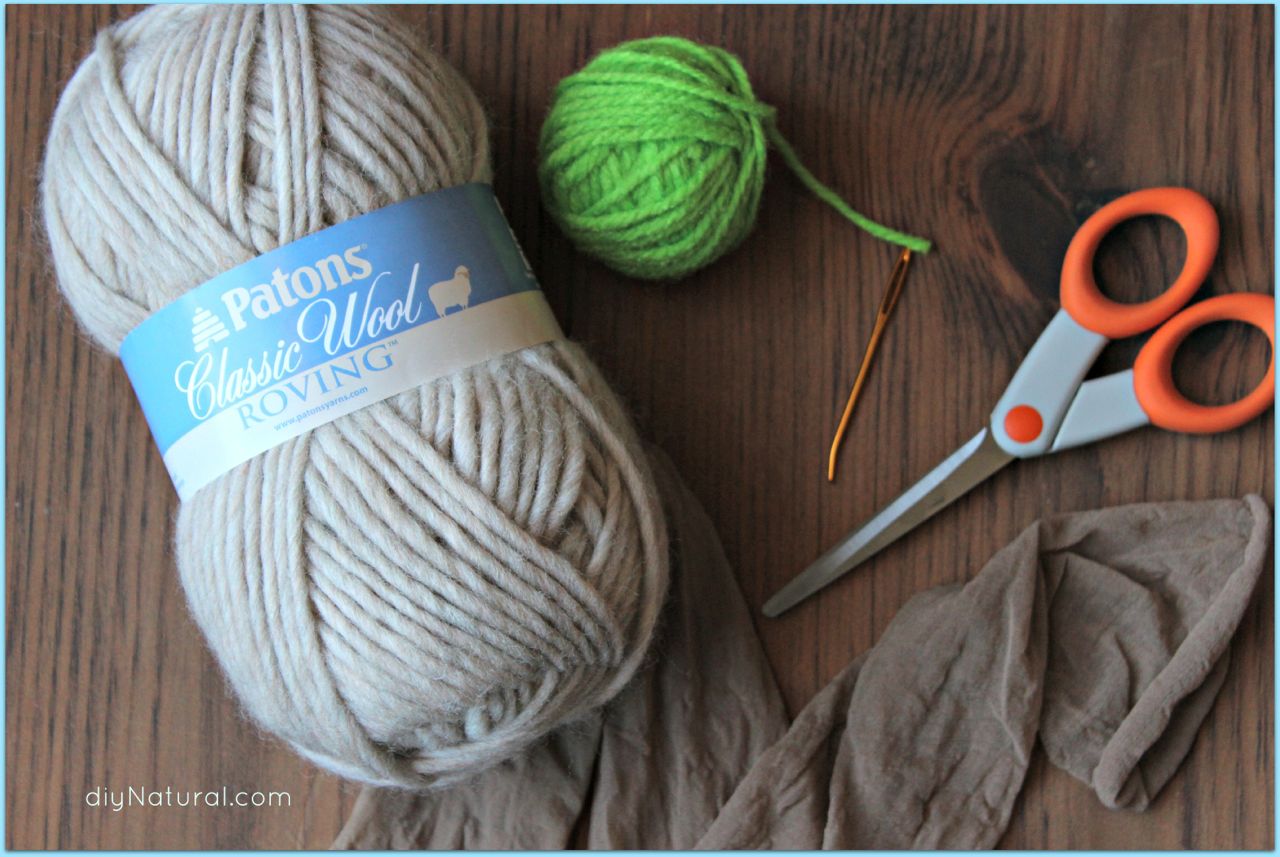
Supplies for Making Wool Dryer Balls
skein of 100% wool yarn (NOT wool labeled “superwash” or “machine washable”) – find my favorite kind here
string or cotton/acrylic yarn (to secure the wool ball in the pantyhose)
Steps For Making Wool Dryer Balls
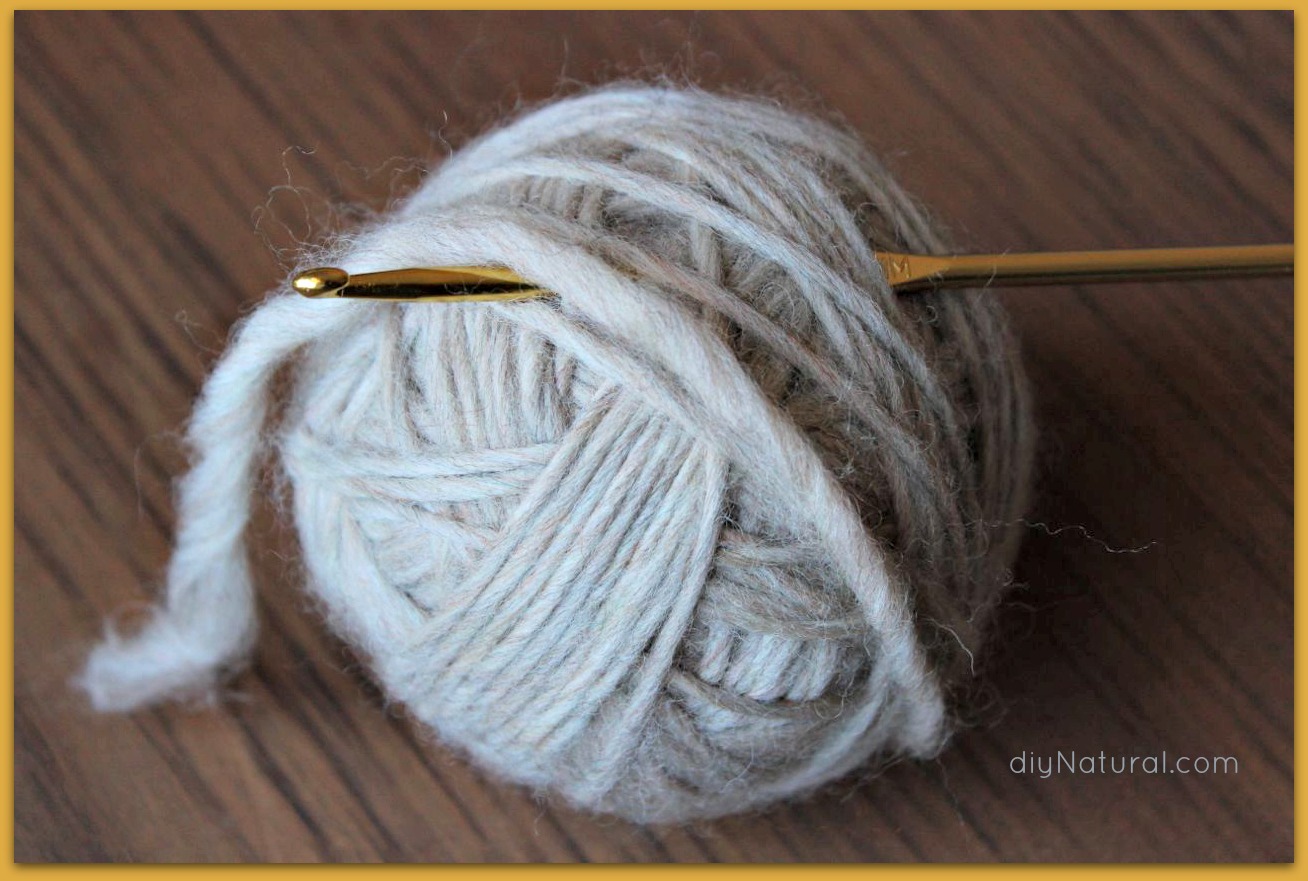
1. Begin wrapping your wool yarn around your first two fingers about 10 times.
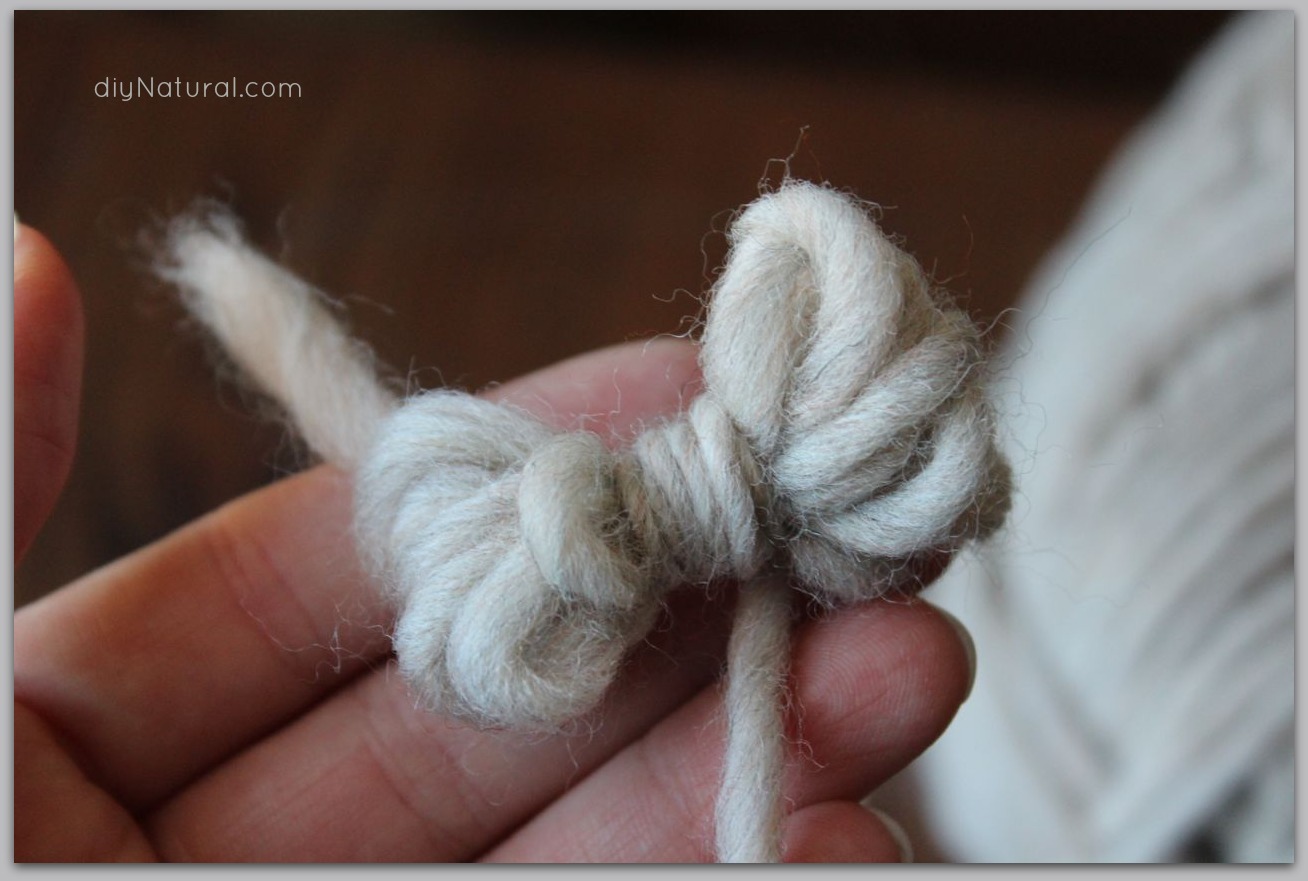
2. Pinch the bundle of yarn in the middle and pull off your fingers. Wrap more yarn around the middle of this bundle.
3. Wrap yarn around the entire bundle until you have the beginnings of a ball.
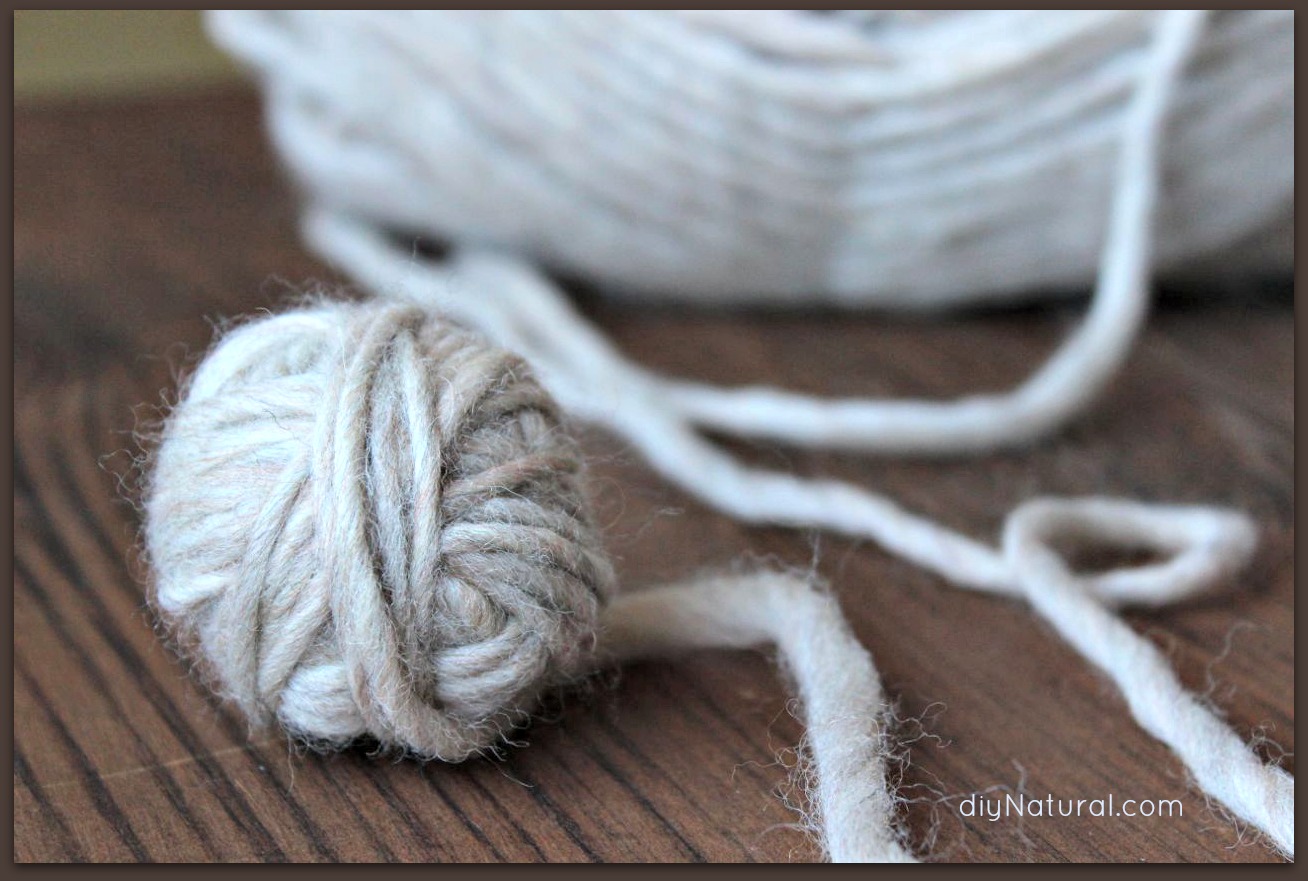
4. Continue wrapping tightly until your ball is the desired size. (I make mine softball-sized to help cut drying time more, but a tennis ball or baseball-sized will help save money on yarn. You can also fill your ball with an old, wadded-up sock or piece of fabric if you don’t want to use so much yarn.)
5. Use a blunt-tipped yarn needle or crochet hook to tuck the end of the thread under several layers of yarn. Pull it through and cut the end.
Repeat these steps with more yarn until you have 4-6 balls.
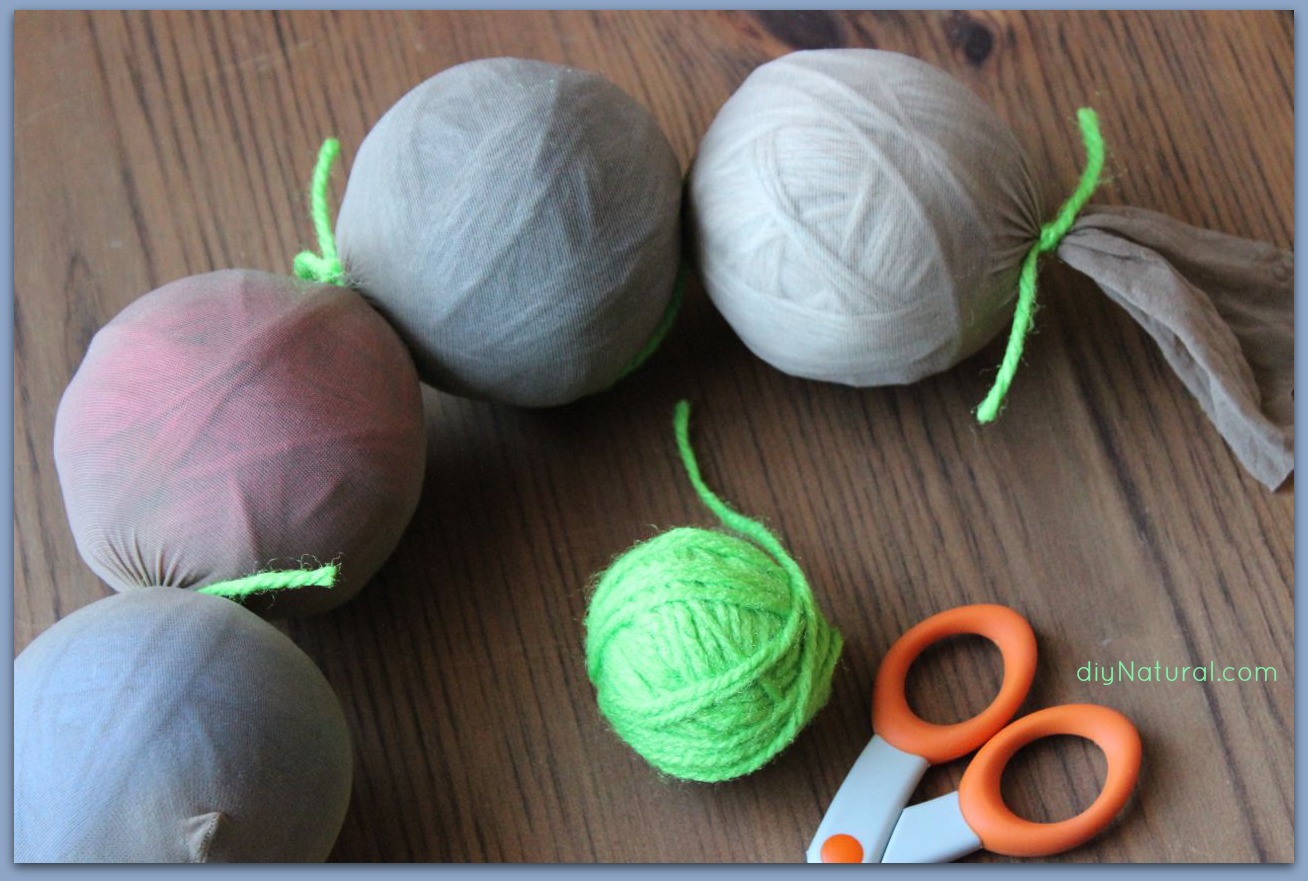
6. Cut the leg off an old pair of nylons, or use knee-high stockings. Put balls into the toe of the nylons, tying tightly in between each one with string, or cotton/acrylic yarn. (Just don’t use wool yarn or it will felt around the nylons.) Tie off the end. Take a few minutes to play with your yarn ball caterpillar if you like.
How to Felt Them
7. Throw the entire yarn caterpillar into the wash with towels (or a load of jeans if you used brightly colored yarn).
8. Wash in a hot wash cycle with a cold water rinse cycle. Dry your yarn caterpillar with your laundry using the hottest dryer setting.
Remove balls from nylons and check for felting. When learning how to make wool dryer balls you’ll see that some types of wool yarn will not felt well on the first try. You may need to repeat the washing and drying cycles up to 3 or 4 times. You’ll know felting has occurred when you can gently scrape your fingernail over the ball and strands do not separate.
Using your Wool Dryer Balls
Just throw these babies in the dryer with your freshly washed clothes, and let them do their work! For regular loads, use at least 4-6 balls to notice a decrease in drying time. For large loads, use 6 or more wool balls. The more you use, the more quickly your clothes will dry.
Store your dryer balls in the dryer between uses or display them in a basket in your laundry room.
If you want to lightly scent your laundry, add 1-2 drops of your favorite essential oil to each ball before throwing it in the dryer. If you’re using a good quality, pure essential oil, you will not have trouble with the oils spotting your clothes. (Find 100% pure essential oils here.) Just be sure to use a clear essential oil.
Love the idea, but don’t want to learn how to make wool dryer balls?
Jiminy’s cricket- and grub-protein dog foods and treats are an effective choice to transform your… The post Greener Shopping Difference Maker: Jiminy’s Dog Food & Treats appeared first on Earth911.
This DIY bubble bar recipe contains simple nourishing ingredients to make your bath bubbly, and leave your skin soft, silky, and smooth.
I love to take baths!
Most of the time I take a shower, just for convenience and to save water, but now and then I like to indulge in a long soak. I’ve used bath salts, scrubs, bar soap, and liquid soap, but I’ve come across a solid soap that’s soft, yet firm. Furthermore, it’s packed with great ingredients for your skin!
Bathing With Safe Ingredients
Most bubble bar recipes on the market are made from SLSA or sodium lauryl sulfoacetate, which is much safer for your skin than sodium lauryl sulfate. That being said, both are chemicals that can irritate your skin to some degree, and SLSA is a very fine powder. When using it, you need to wear a mask, or it can get into your nose and sinuses. Due to these issues, I’ve created a much safer recipe that doesn’t contain SLSA.
Begin this bubble bar recipe by sifting all of your dry ingredients together to be sure there are no lumps. Add the melted butter and oil and stir well. You may want to put gloves on to mix it well. Add the soap in a little at a time, mixing well after each addition. Drip the color and mix well, or divide the mixture into two or three bowls and color each one separately. Add the essential oil and mix it in. You should have a dough-like mixture. If it’s too dry, add a bit more liquid soap. You can also add a bit more cornstarch or arrowroot powder if it’s too wet.
¼ cup non-GMO cornstarch, ¼ cup citric acid, 1 cup baking soda, ¼ cup milk powder, ¼ cup cocoa butter, 2 Tbsp sweet almond oil, 1 Tbsp natural liquid soap, a few drops natural food coloring, 8-10 drops essential oil
Turn out onto a powdered surface and knead like bread dough. When it gets firm, you’re ready for the next step.
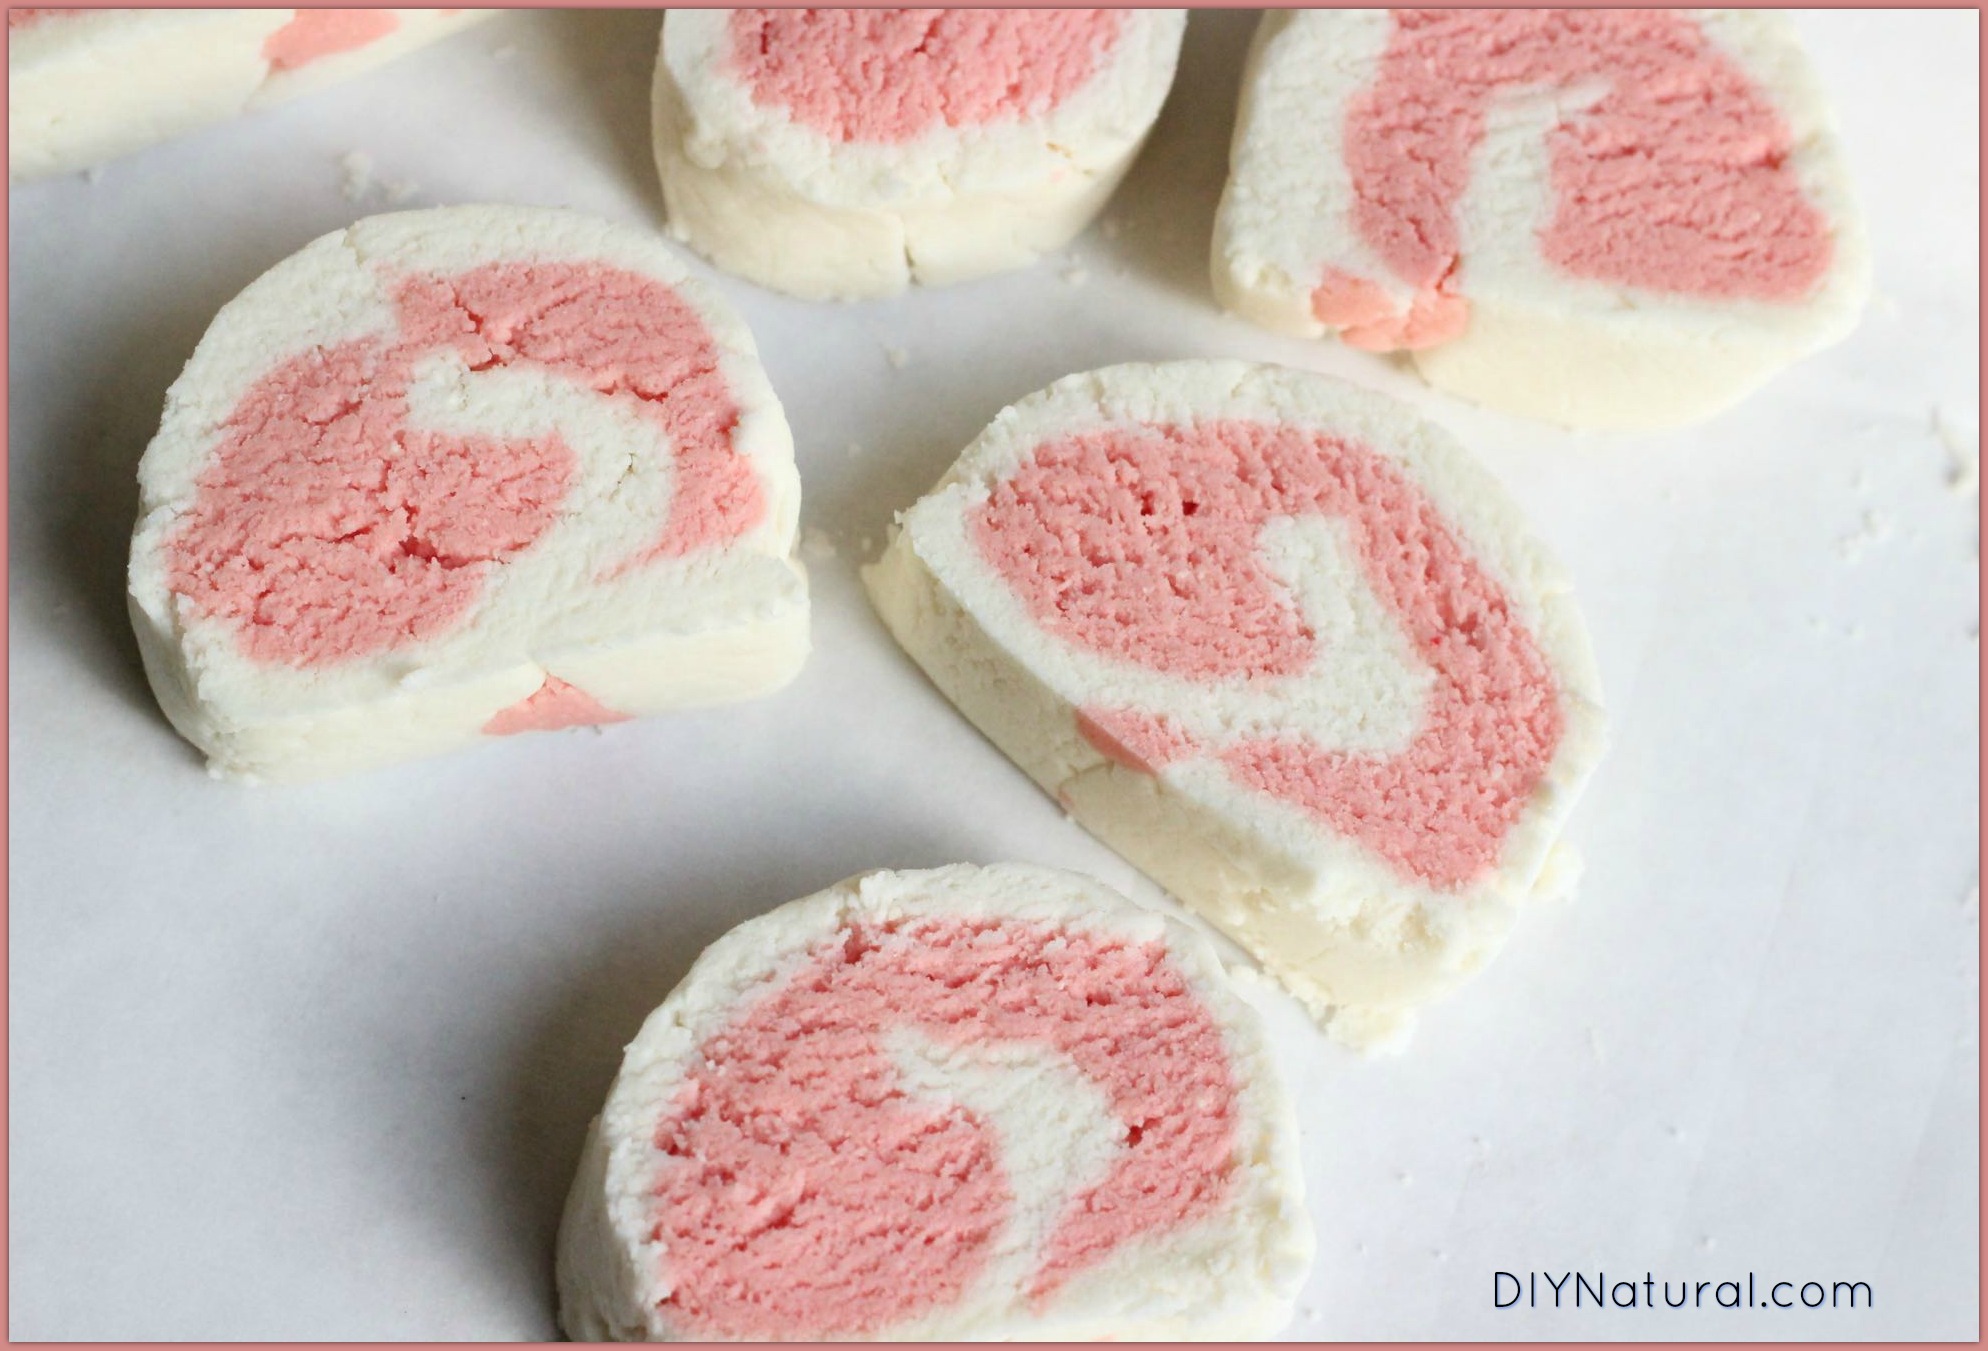
Shape the bubble bar recipe bars any way you like. You can layer colors, roll them into a log, and cut them to the desired size. It can also be shaped into balls. Try adding bits of each color to the balls as you are shaping them for a fun effect. I like to make mine into “truffles.”
Finally, let your DIY bubble bar dry out for 2-3 days. Once they are thoroughly dry, place them in a jar with a tight-fitting lid. These will keep for a few months unless you use them up before then!
Video
To Create Fun Shapes
Simply mold the DIY Bubble Bar like clay to make them into any desired shape. (Check out this unique bar.)
This bubble bar recipe looks fun in the shape of a scoop of ice cream (see some here). To make, pack the mixture into an ice cream scoop. Mix colors to create a swirled ice cream effect. Next, press the lever and gently place the scoop onto a sheet of parchment paper. This works best with an ice cream scoop with a trigger. This will give you ridges that look like real ice cream. Finally, dust with glitter if you like. There are several colors of biodegradable glitter that can be used (find it here).
Using your DIY Bubble Bar
This bubble bar recipe is easy to make and use. You can either place the whole thing in the bathtub with the water running or pinch off a piece and hold it under running water to create bubbles. You might need to rub your hands together a bit to soften up the bar. Another method is to place the bar in a muslin bag and hang it so it is in contact with the running water.
Since you’ll get plenty of bubbles from using a small amount, I’ve never needed a whole bar for a bath. You can hold it under running water just until you have enough bubbles, then dry out the remaining bar to use during your next bath.
Do you take baths? What is your favorite way to create natural bubbles in the tub? Do you have a bubble bar recipe to share?
Learn how to make pumpkin puree for use in pumpkin pie this year! It’s simple, delicious, and you can even freeze it for use all year long.
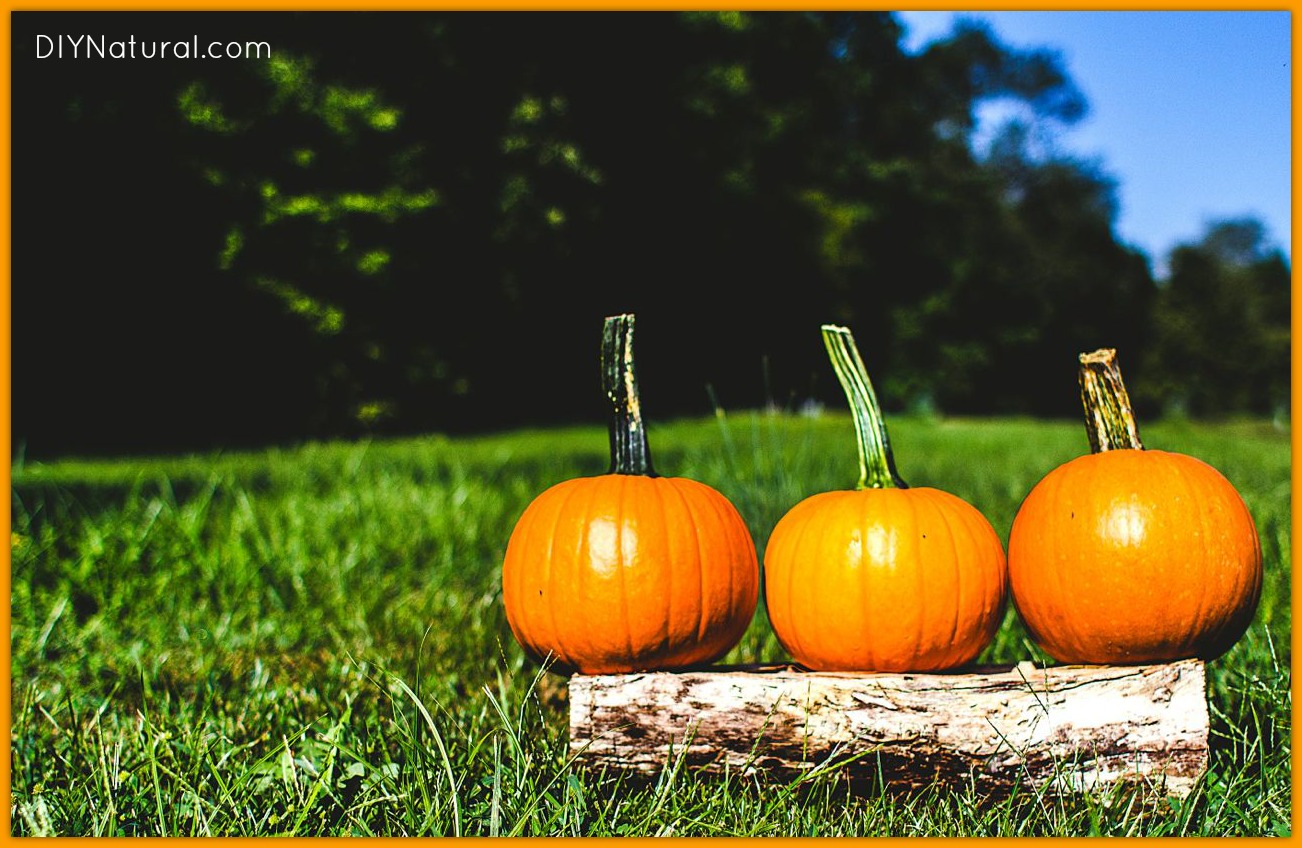
Nothing says autumn like a big pile of orange pumpkins!
This is the time of year when those beautiful gourds are ubiquitous: they’re on front porches, in giant crates at the grocery store, and brightly adorning roadside farm stands. Everything is pumpkin flavored too, but I have to admit that I find that rather less refreshing. Pumpkin-flavored stuff usually doesn’t have an ounce of pumpkin in it – it’s all about the spice blend used. It’s all good and well if you love the taste of nutmeg and cloves, but real pumpkin deserves some attention too.
While carrots usually get all the credit for providing beta carotene, pumpkins are also high in this nutrient. Beta carotene is important because your body converts it to Vitamin A. Vitamin A is important for eyesight, your immune system, and healthy skin. Plus, pumpkins are full of fiber. It can be hard to find foods that taste good, are low-calorie, and have fiber, too. Pumpkin fits all three of those requirements! Pumpkin seeds are also incredibly healthy; they contain zinc, fiber, magnesium, protein, and more. When you stop to think about all of the nutrition you can find in a simple pumpkin, you’re going to wonder why you’ve been using this superfood solely as a porch decoration for so long.
While there are several ways to eat pumpkins, I find the simplest way to start is to turn them into a puree. It’s a simple process, and at the end of it, you’ll have plenty of pumpkin puree to store in your freezer for the coming months.
How to Choose Pumpkins
Did you know that there are dozens of varieties of pumpkins? It can be overwhelming to choose the best type to preserve. Technically, you can use any variety of pumpkins that you like, but some are certainly better than others. Smaller pumpkins tend to be sweeter, and therefore make tastier purees. These are often referred to as pie pumpkins.
If you’re going to grow your own pie pumpkins, look for varieties like New England Pie, Sugar, or Baby Pam. Growing your own pumpkins is fun and rewarding, but if you don’t have garden space or your crop doesn’t turn out, you’ll have to look elsewhere. This year we bought ours at our local farmer’s market. Pumpkins are not always labeled by variety, so we just looked for the healthiest small pumpkins we could find. Pie pumpkins are smaller, rounder, and have longer stems than jack-o-lantern pumpkins.
So you know how many to buy, keep in mind that I used five pumpkins and ended up with a gallon (16 cups) of pumpkin puree. It’s probably a good idea to start out with two pumpkins if this is your first time.
How To Make Pumpkin Puree and Freeze It
Once you have picked or purchased your pie pumpkins, you’re ready to turn them into a puree!
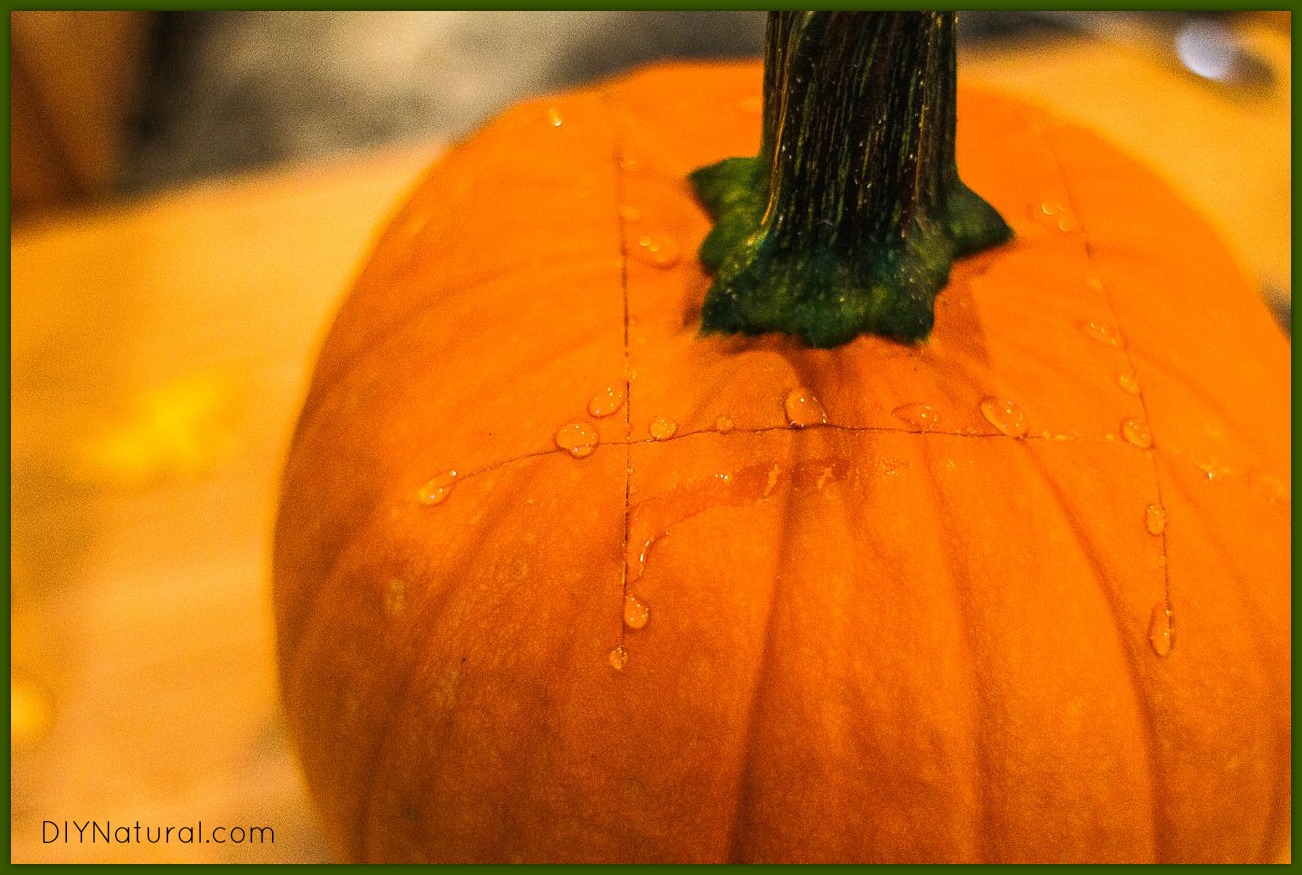
Step 1:
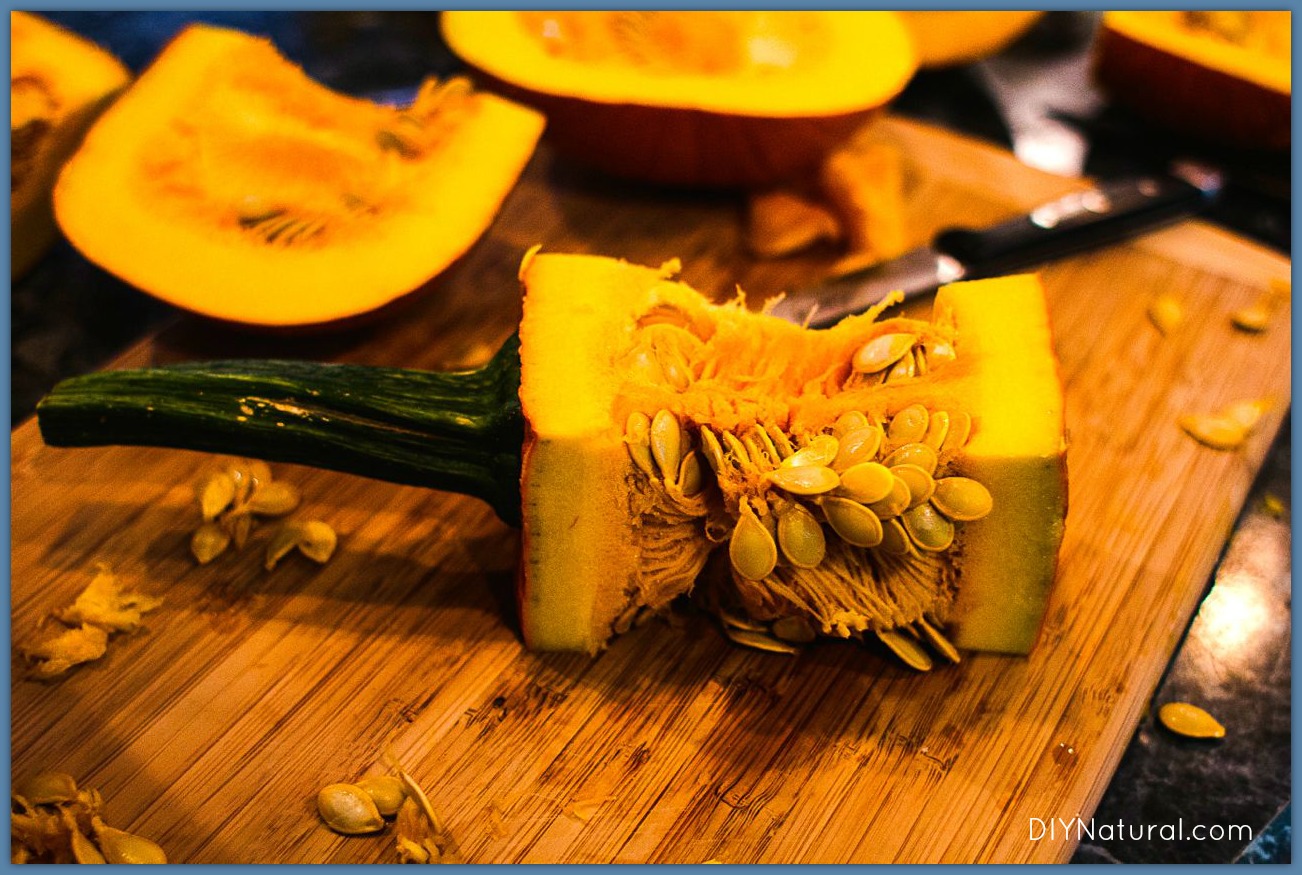
After you wash the pumpkins, cut them into rough quarters. My favorite method is to cut down, from top to bottom, leaving a square around the stem. The pieces aren’t quite even, but it’s easy to cut that way, and most of the waste is in the middle. That’s less scooping for you!
For the remaining pieces, scoop the insides out and set them aside. You can also take this time to separate the seeds out from the rest of the pulp (your hands are already slimy and sticky, so it’s a good time to do it), or you can wait and do that at the end of your project. (Once you’re finished, make sure to wash, season, and bake your seeds. They make a great snack!)
Be prepared: this is a fairly time-consuming, messy process. Make sure you rinse your hands frequently because slippery hands and big knives do not make for a happy combination.
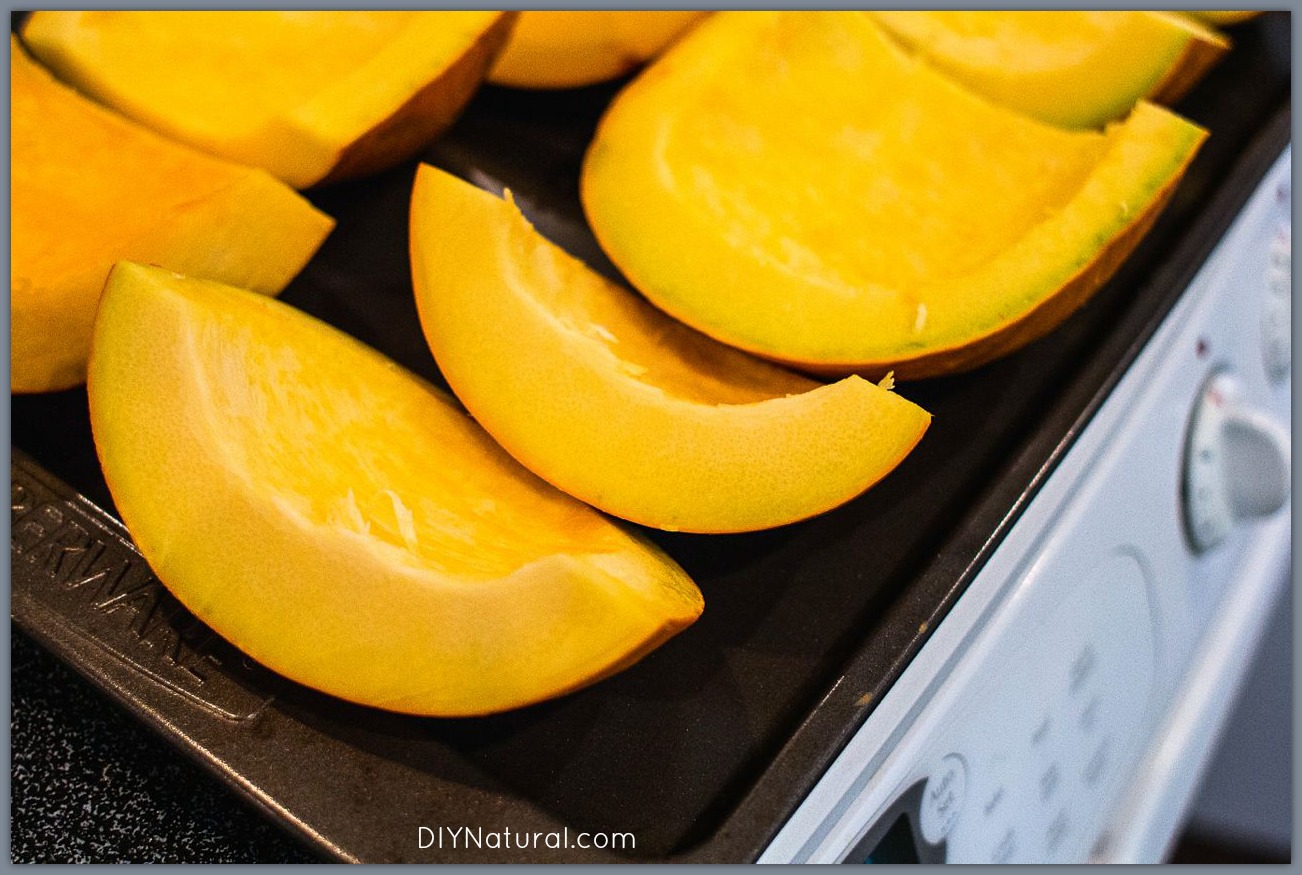
Step 2:
Once you’re done cleaning and quartering your pumpkins, it’s time to put them on cookie sheets. They will drip as they cook, so this protects the bottom of your oven. Put them in the oven and cook them at 350° for 45 minutes or so. You can use the old stick-a-fork-in-it method to determine doneness.
Step 3:
Once your pumpkins finish baking, separate the flesh from the peel. Put the flesh into a food processor or blender and process until smooth. Depending on how many pumpkins you are pureeing, this may take several batches.
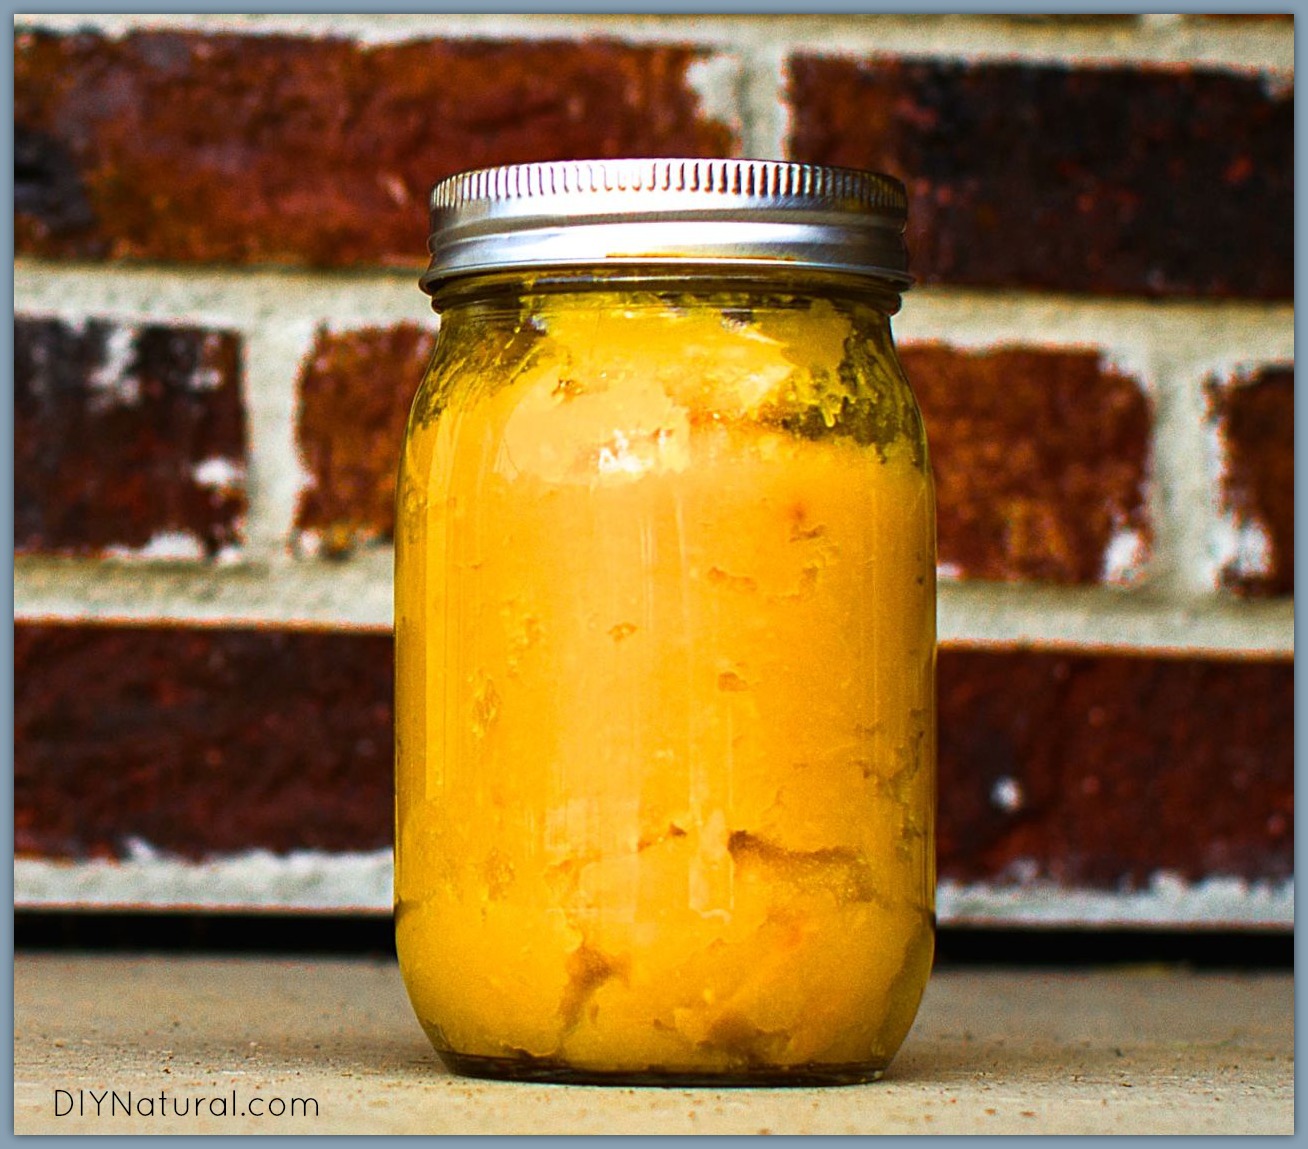
Step 4:
Prepare for freezing. You can use plastic freezer bags, but the safest method would be to use glass jars or other glass freezer containers. Decide ahead of time how much you will place in each container. I recommend one cup per container, but you should use whatever safely fits in your container and/or what you foresee to be the amount you will most frequently need.
A note when freezing in glass jars:Use canning jars, not recycled glass jars. Canning jars are thicker and less likely to break when food expands as it freezes. To further prevent breakage, leave headroom in your jars so that your food has room to expand upward.
Why You Can’t Can Pumpkin Puree
I have a feeling, one of the first questions you’ll ask is, “Can we can this pumpkin puree?” I wish it were a possibility to do so, but the USDA recommends against it and has since 1989. The two main reasons are the thick consistency of pureed pumpkin and the low acidity of the fruit. Combining those two things mean it’s impossible to guarantee that you can kill all of the botulism spores when processing. So, for better or worse, it is best to freeze pumpkin purees.
How Should I use Pumpkin Puree?
If you’ve never made pumpkin puree before, you might not have thought about all the ways you can use it. Here are a few ideas: