Learning how to make beeswax candles gives you a fun new skill and control over the ingredients. Use these, give them away, or sell them!
Why Learn How to Make Beeswax Candles?
Nothing provides cozy warmth in your home like the soft glow of a candle. Therefore, why not enjoy the charm of candlelight AND be confident your indoor air quality is actually improving?
It can happen, but not with your standard candle. This is because store-bought paraffin candles are made from petroleum-based wax, and studies suggest that they actually release toxins into the air that you breathe. Furthermore, some candles are made with wicks that contain lead, which is released into the air when burned and deposited on surfaces in your home.
Candlelight dinner with a side of toxic chemicals? Check, please!
Health Benefits of Beeswax Candles
One fabulous alternative to paraffin candles is a natural beeswax candle. Did you know that beeswax candles are a natural air purifier? They work through a process called negative ionization.
Beeswax is a fuel that produces negative ions when burned. Further, since opposite charges are attracted, these negative ions will attach to positively charged particles in the air, such as bacteria, viruses, and allergens like dust and pollen. These new clumps of particles become heavier, allowing gravity to pull them down where they can be swept or vacuumed. (source)
Even soy candles can’t compare to beeswax, since most soy in the US is genetically modified, and highly contaminated with pesticides. According to this article, even 100% soy candles must be processed with a small amount of paraffin, which means those chemicals are still being released when burned.
So to be sure you’re getting a quality, healthy candle. Or make your own, which is another reason why learning how to make beeswax candles is a great option.
A Few Tips Before Beginning
I first tried learning how to make beeswax candles over a year ago.
I melted tons of beeswax, poured it into random containers, and threw in a thick strand of hemp string for a wick. It turned out I had lots to learn. When my candles didn’t turn out well I determined to figure out where I went wrong (and use up the giant amounts of beeswax I had already purchased).
Wick Type and Size
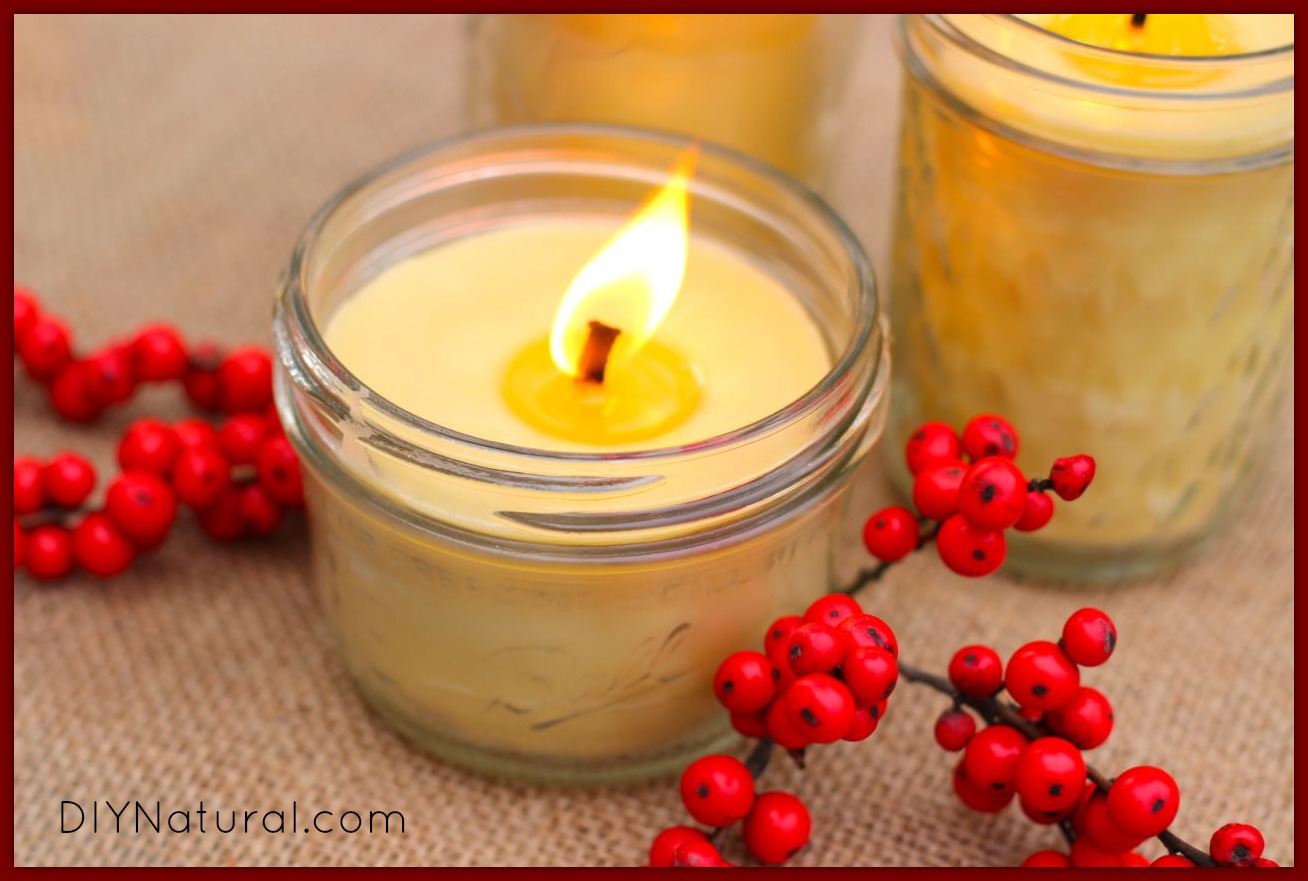
It turns out the wick is one of the most important considerations while making beeswax candles. I talked to a few beeswax candle makers, and all agreed that a cotton square-braided wick was best for this type of candle. In addition, you must have the correct wick size, which is determined by measuring the diameter of your container. To make this easy, I decided I would pour my candles into mason jars so I would always know the container dimensions.
Size
To determine the wick size, I used this wick sizing chart. I used #6 cotton square-braided wicks for my wide-mouth mason jars and found that #4 worked best for the small-mouth jars. Using these thick square wicks allows more beeswax to be burned at a time. This prevents the wax pool from rising up and drowning your wick and keeps the candle from tunneling until it self-extinguishes. (Note: If your candle burns too quickly, you need a thinner wick [smaller number]. However, if your candle tunnels and won’t stay lit, try using a thicker wick [larger number].)
The particular beeswax you’re working with can also affect the way the wick burns, so you may want to experiment to find the wick size that works best for you.
Blend your Beeswax with Palm Oil
Beeswax is a very hard wax with a high melt point. Sometimes this creates a very weak flame or causes the wick to drown. Beeswax also needs to cool down very gradually, or your candles will have large ugly cracks through them. To prevent these problems, you can blend palm oil with your beeswax. Palm oil is much softer, with a lower melt point, and is a very clean-burning oil to use for candles. I found this article that suggests a 50/50 blend is optimal, and sure enough…my candles finally turned out wonderfully when I did this!
Note: Just be sure to find palm oil/shortening that is sustainably sourced (like this brand)! The production process for much of the palm oil used today destroys rain forests.

How to Make Beeswax Candles
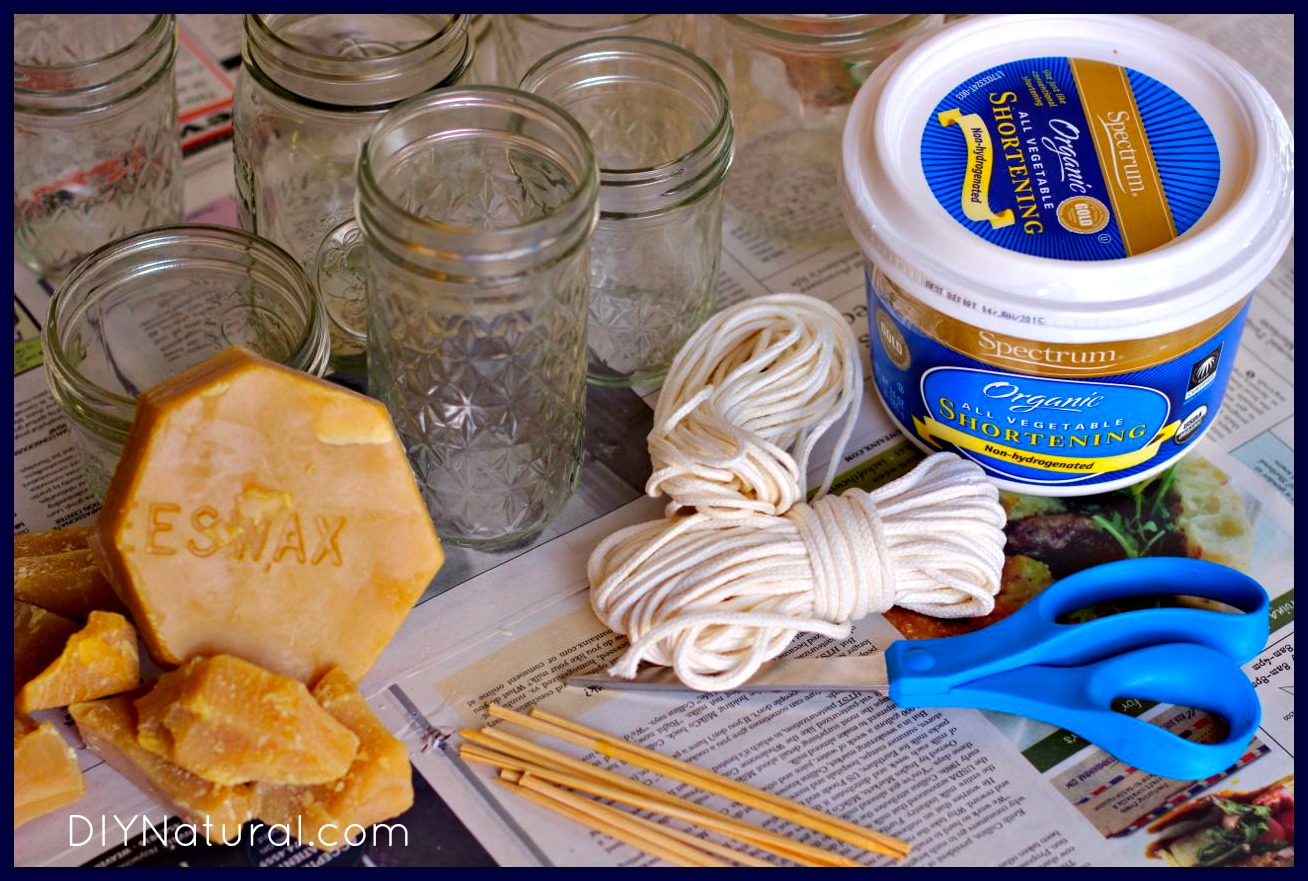
Ingredients/Supplies
- 12 oz. beeswax, roughly chopped (find it here or from a local beekeeper)
- 12 oz. organic palm oil/shortening (find a sustainably-sourced brand here)
- mason jars (I filled 4 half-pint jars with this recipe)
- square braided cotton wick (find #4 wick here, and #6 wick here)
- kitchen scale – for weighing ingredients (find a good one here)
- wooden skewers (cut in half) or pencils – to keep wicks in place (like these)
- newspaper for covering work areas
- large glass measuring cup for melting ingredients (I use this 4 cup Pyrex one)
Method
1. Using a kitchen scale, measure 12 oz. of beeswax in your large glass measuring cup. Place this measuring cup into a pan filled with a few inches of water. Melt beeswax over medium heat. (Do not heat your beeswax over high heat or it could ignite.)

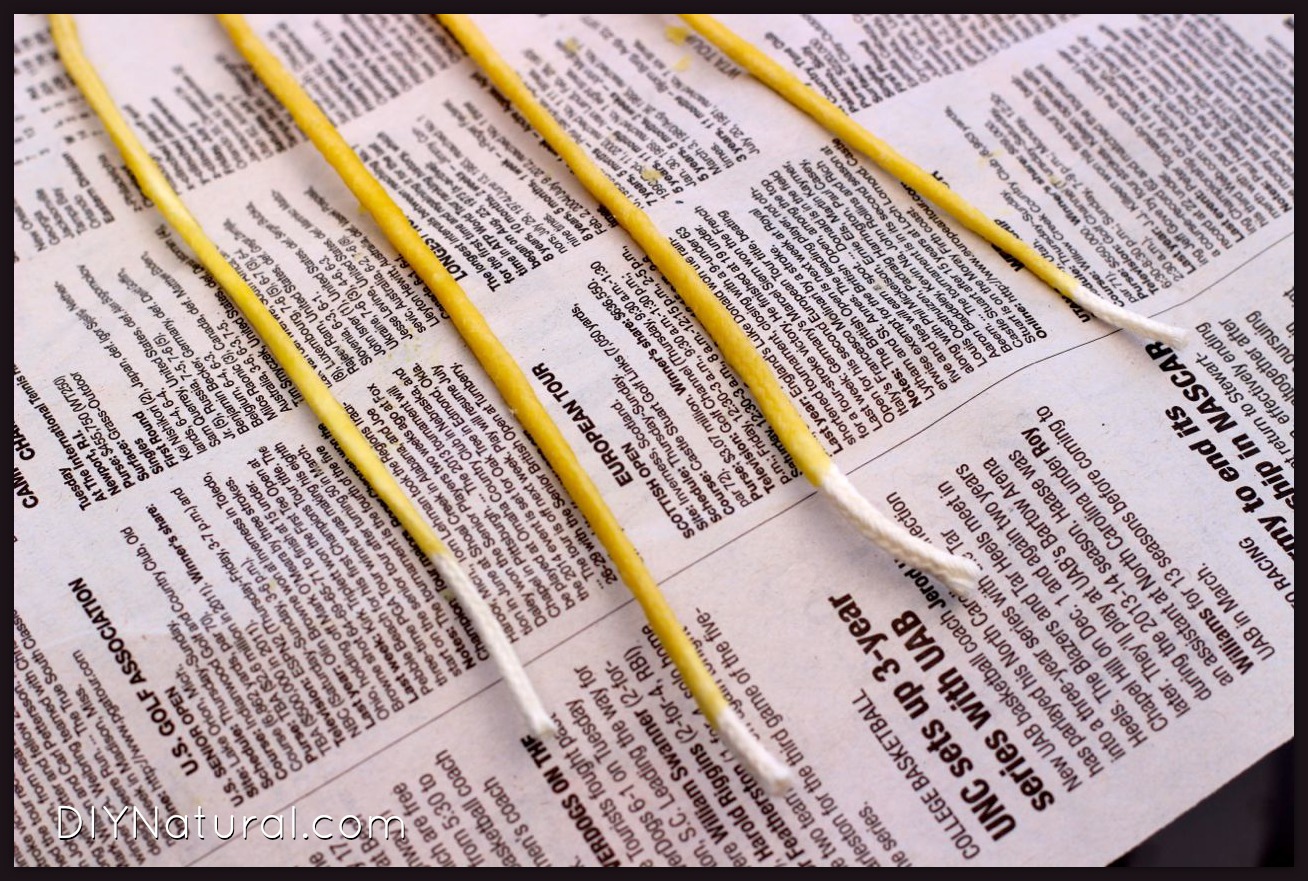
2. Cut wicks that will be at least a few inches taller than the jars you’re using while your beeswax melts. Once the beeswax begins melting you can carefully dip one cut wick in the wax. After dipping, carefully lay the wick on a sheet of newspaper, holding one end with your fingers, and straightening it out by holding the other end down with a skewer and gently pulling it. Repeat with all the wicks. Allow wicks to dry.
3. Using your kitchen scale, weigh palm oil, and set aside. Add palm oil to mostly melted beeswax and stir while it finishes melting.
Method Continued
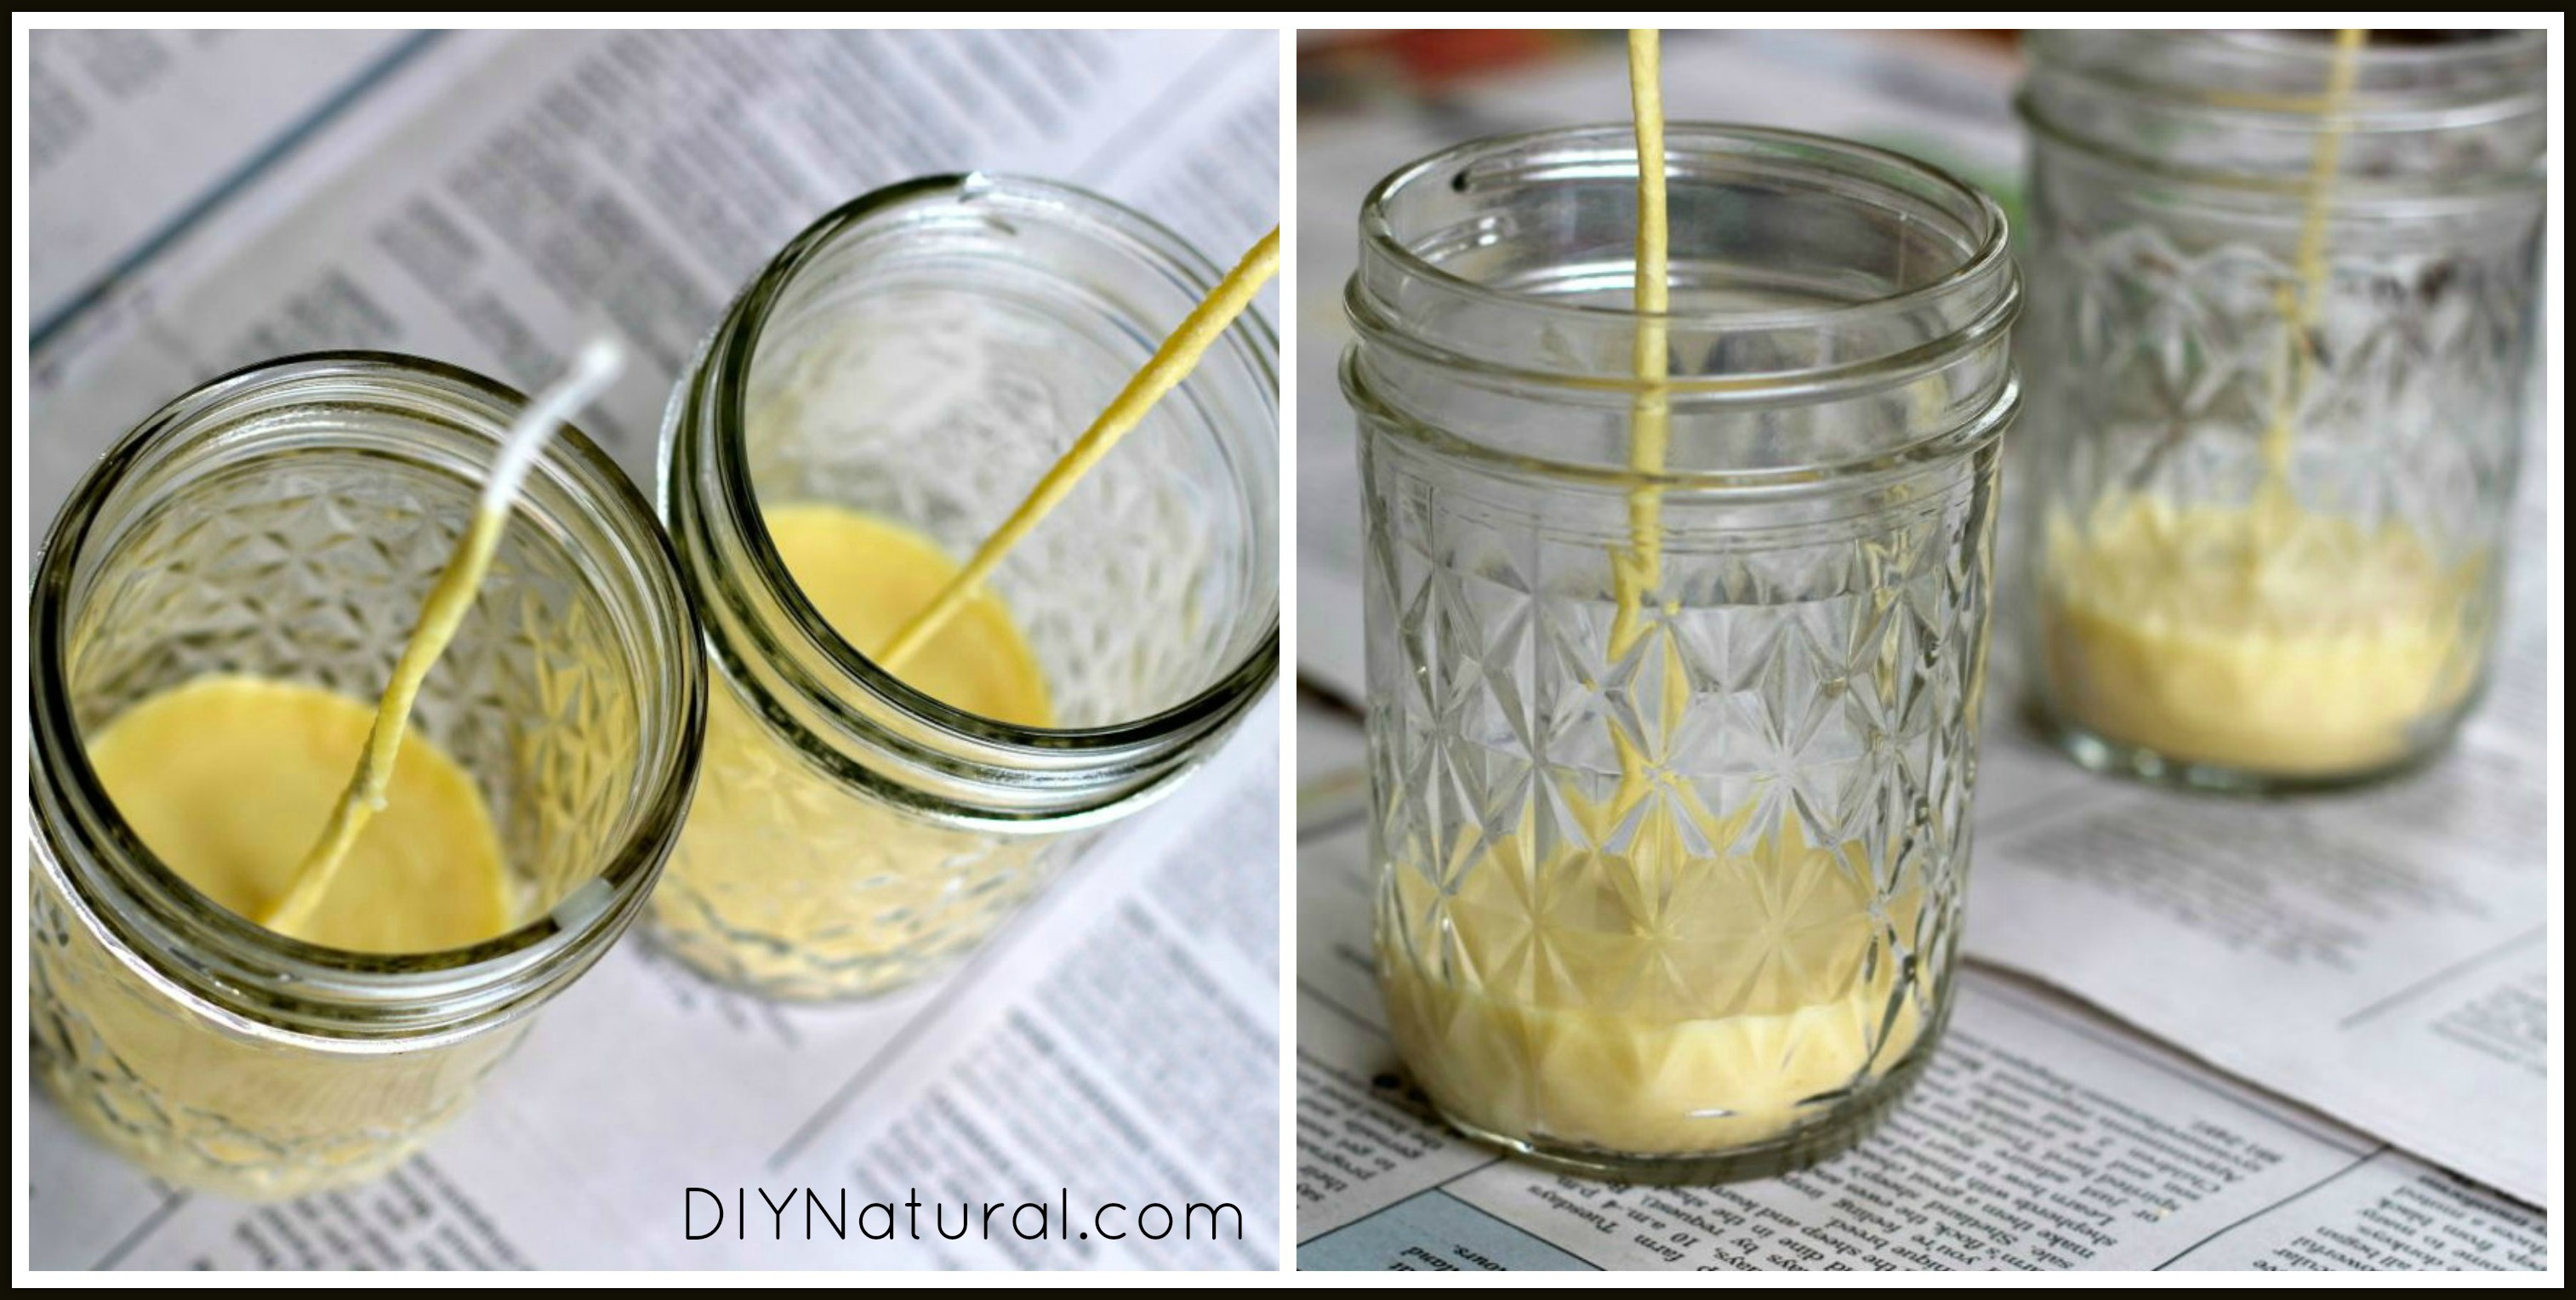
4. When the beeswax/palm oil mixture melts, stir carefully with a skewer. Pour about ½ inch of hot wax into the bottom of one beeswax candle jar, then immediately place a wick into the center of the jar so it just touches the bottom. Hold the wick in place gently until wax hardens enough for the wick to stand on its own. Set aside to harden completely. Repeat this step with all your jars.
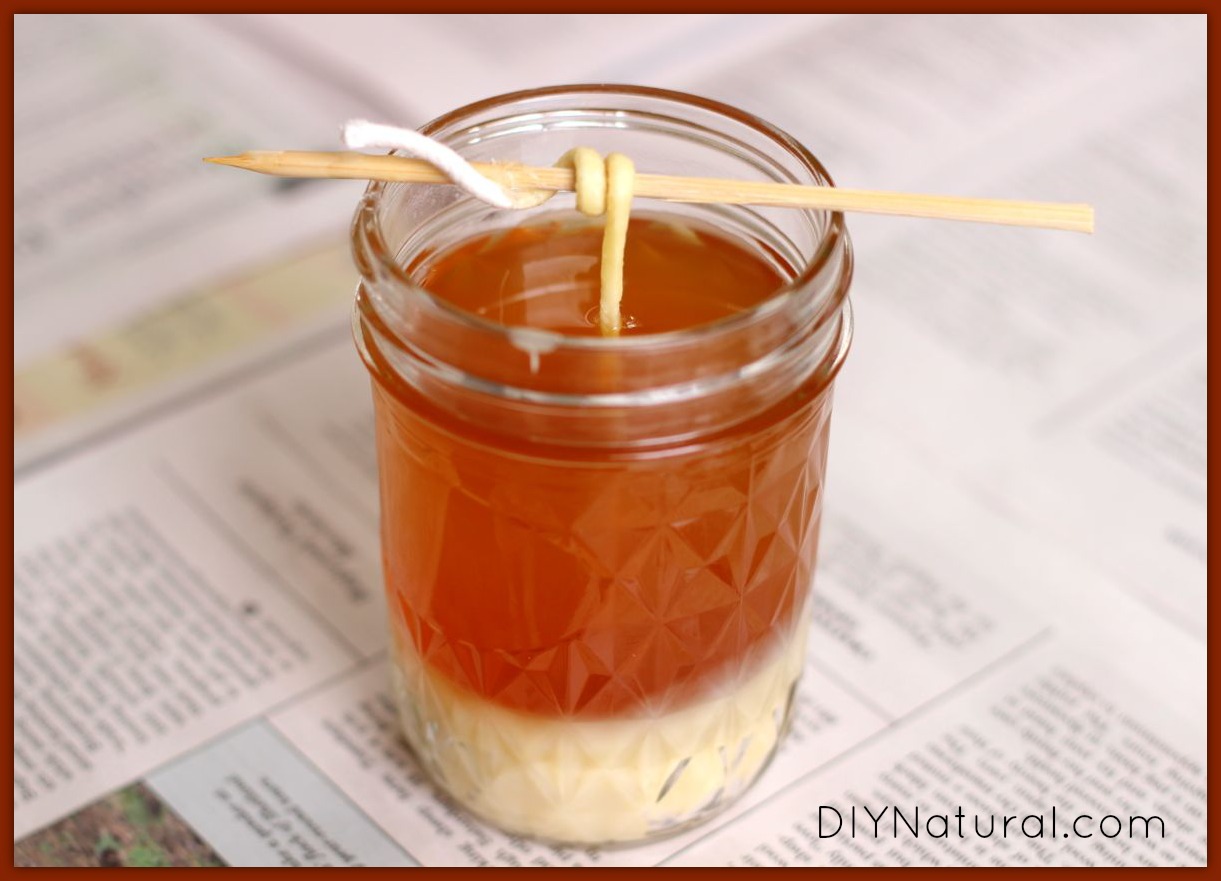
5. Rest a skewer on top of each jar, gently wrap the wick around the skewer, and make sure it’s positioned straight. With wicks secured, finish pouring hot wax into each jar; and leave headspace at the top. Set aside to cool and harden completely (12 – 24 hours).
6. Cut wicks, leaving them ¼ – ½ inch long.

7. Light and enjoy your beautiful new candles! (You may have to hold a flame over the wick a little longer to light a beeswax candle. This is normal.)
These handmade candles make the perfect gift. Screw lids on the jars, tie ribbons around them, and share with friends and family!
Tips on Cleanup
When working with beeswax, keep in mind that it will harden when cooled. I use tools like wooden skewers so I can throw them away when done. Consider using tools that can get beeswax on them without causing a problem (like disposable chopsticks or old pencils). When your candles are poured and your glass measuring cup is still warm, it’s best to wipe it out with a paper towel or an old piece of fabric that can be thrown out. Get as much beeswax off as you can before washing it in hot soapy water.
Check out our other articles on making things out of beeswax!
Do you know how to make beeswax candles? Did you know how beneficial beeswax candles are?
*******
How to Make Your Own Natural Beeswax Candles was written by Betsy Jabs.
* This article was originally published here
No comments:
Post a Comment